Halloween isn’t just about pumpkins on porches—it’s about transforming your entire home into an experience, and your walls are the perfect blank canvas. Picture paper bats swooping across the hallway, haunted portraits whispering secrets in antique frames, and glow-in-the-dark webs catching candlelight just right.
With these 20+ DIY Halloween wall decoration ideas, you’ll learn how to:
Create renter-friendly and budget-friendly designs using everyday materials.
Blend spooky with stylish to keep your space looking chic, not cheesy.
Add interactive touches perfect for parties or family fun.
Whether you’re crafting your first DIY project or looking to level up your spooky aesthetic, these ideas will help you build a Halloween-ready home that feels custom, creative, and completely unforgettable.
Store-bought Halloween décor has its place, but it often feels generic and pricey. DIY Halloween wall decorations give you creative freedom to match your vibe—whether it’s spooky and gothic, playful and family-friendly, or sleek and minimalist. You control every detail, from color palettes to wall-safe mounting, so you can decorate boldly without damaging your walls or your budget.
And you don’t have to do it all from scratch. Pair your handmade creations with curated pieces from our Halloween Wall Decor Collection for a perfectly haunted yet polished look.
Halloween decorating doesn’t have to empty your wallet. These quick, beginner-friendly projects use items you already have at home, proving that with a little creativity, even simple materials can create dramatic, haunted effects. Each idea is renter-friendly and perfect for adding instant spooky charm without leaving a mark on your walls.
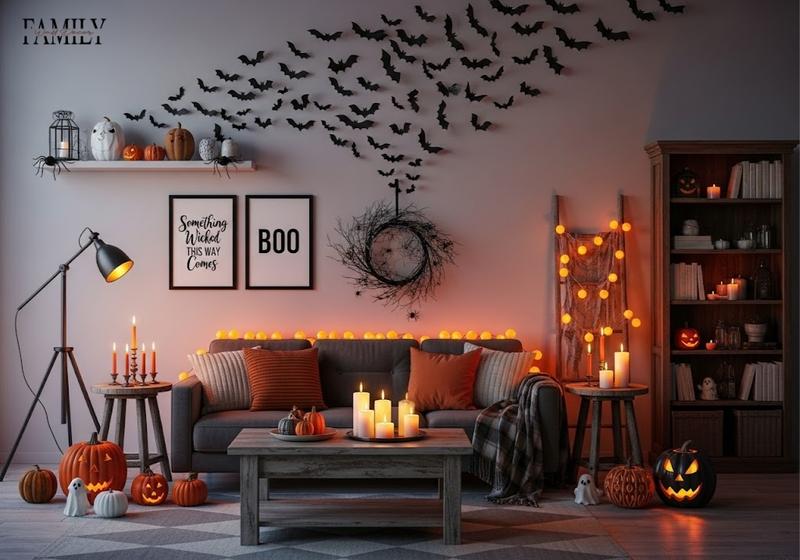
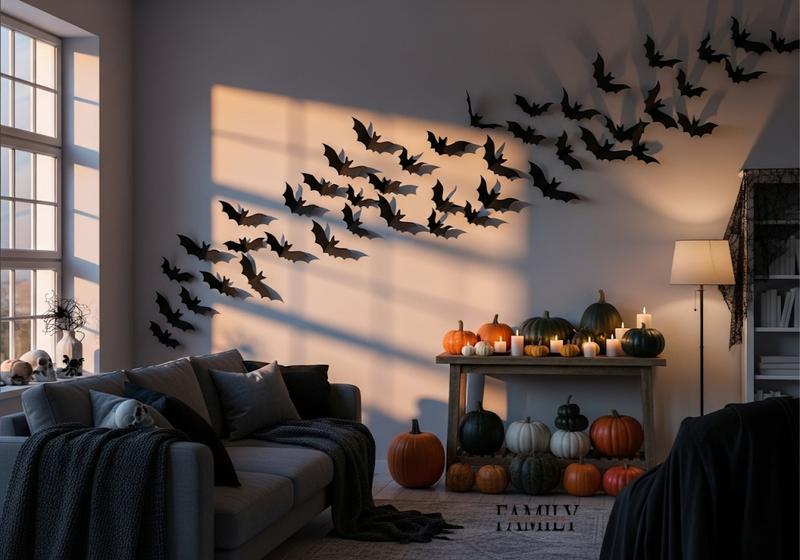
Cut bat silhouettes from black cardstock and fold their wings slightly to add dimension. Arrange them in sweeping flight patterns as if escaping from a hidden roost. Under soft evening light, their angled wings cast eerie moving shadows that make your walls feel alive—yet the whole project costs just a few dollars and about 20 minutes of your time.
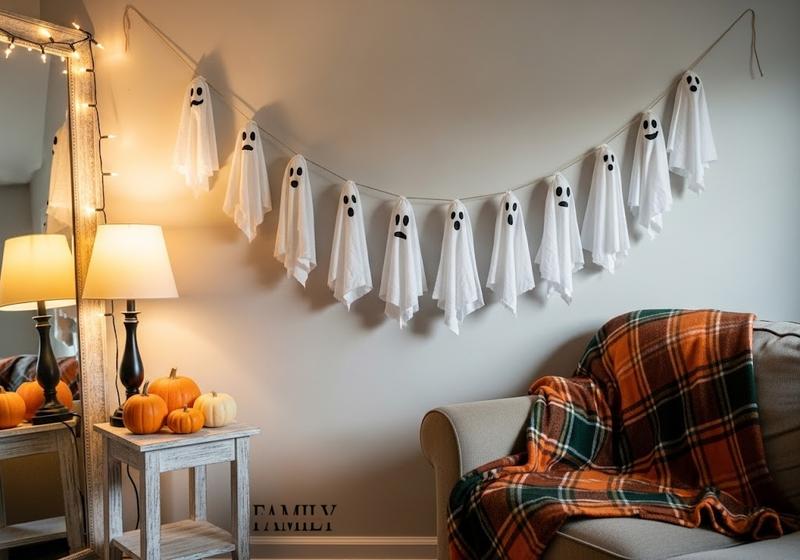
Give new life to old bedsheets or cheesecloth by turning them into ghostly figures. String them along twine and hang them across doorways, windows, or feature walls. Draw expressive faces—silly or spooky—with a permanent marker. The light fabric catches even the faintest breeze, making your “floating ghosts” sway and add movement to your space.
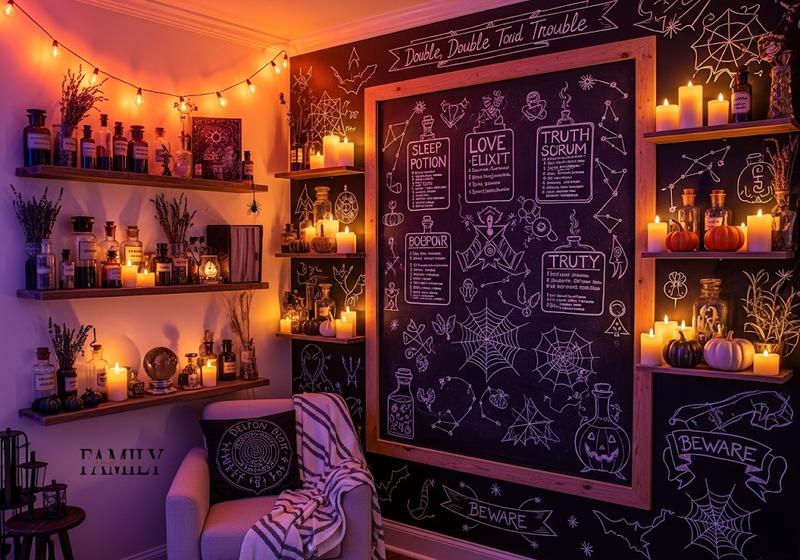
Turn a blank space into your own witch’s lair with a peel-and-stick chalkboard panel or a removable board painted with chalkboard paint. Sketch potion recipes, mysterious symbols, or even let guests leave spooky messages. When the party ends, wipe it clean and it’s ready for your next seasonal design—no wall damage, no mess, pure creativity.
Print chilling quotes such as “Something wicked this way comes” and display them in rustic frames. Choosing wood-style or vintage-inspired frames, like those in our Farmhouse Wall Decor Collection, adds a layer of warmth and texture, turning simple paper prints into a curated gallery wall with a touch of old-world Halloween charm.
When you’re ready to move beyond simple cutouts and banners, these ideas deliver high-impact visuals with a stylish, designer edge. They focus on layering textures, dramatic lighting, and a touch of eerie elegance—perfect for creating a Halloween space that’s as Instagram-worthy as it is spine-chilling.
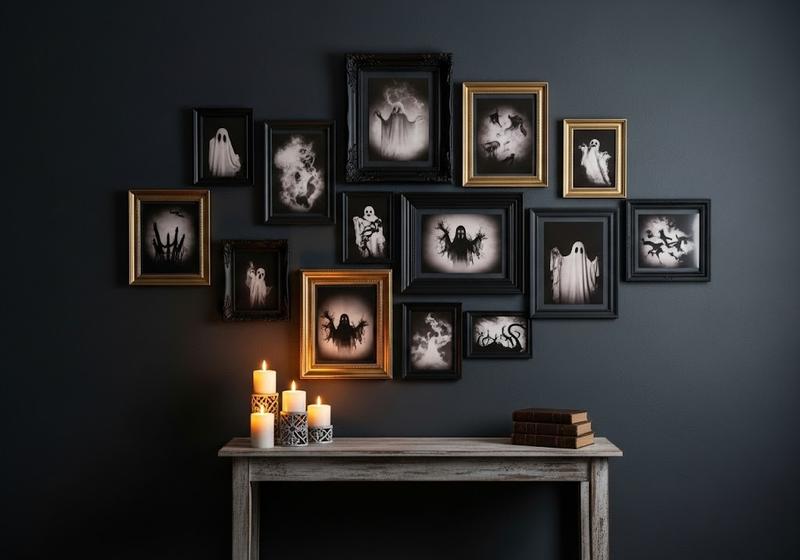
Imagine a gallery wall of “ancestral portraits” staring back at your guests. Spray-paint thrifted frames in matte black or antique gold, then insert eerie vintage photographs or X-ray images. Cluster them together in uneven shapes so the frames feel collected over centuries rather than bought in one trip. Under dim lighting, the glossy photo eyes seem to follow you, adding an unsettling but classy vibe.
Stretch white yarn into a sprawling web anchored with removable hooks, and coat it with glow-in-the-dark paint for an otherworldly shimmer. When the lights go off and a candle or LED lantern flickers nearby, the web glows like it’s been spun by a supernatural spider—and yes, it’s renter-friendly to remove once the season’s over.
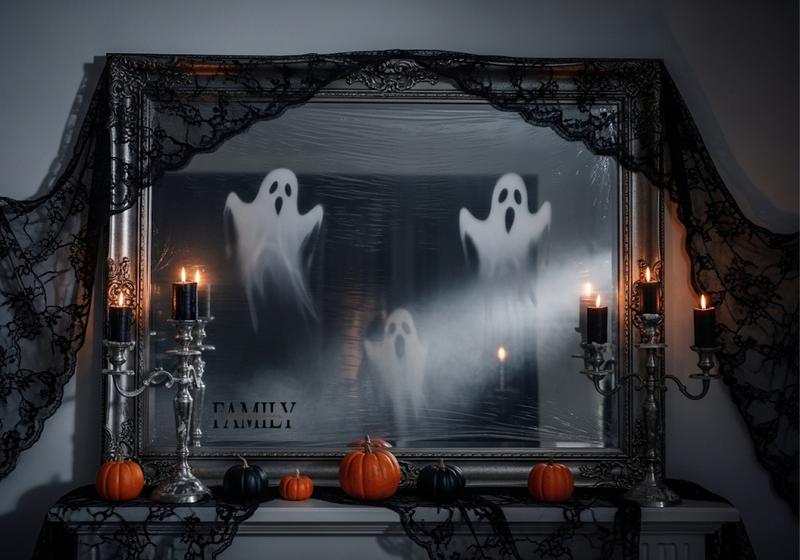
Turn an ordinary mirror into a haunted focal point by covering it with translucent cling film featuring faint ghostly shapes or smoky gradients. As people walk past, their reflections blend with the faint ghost image, creating a shiver-worthy illusion without damaging the mirror or frame.
Cut towering haunted trees or a witch riding her broom from foam board or cardboard and secure them flat against your wall. Place a low spotlight at floor level so the cutouts cast long, dramatic shadows, giving your room the depth and drama of a stage set in an old gothic playhouse.
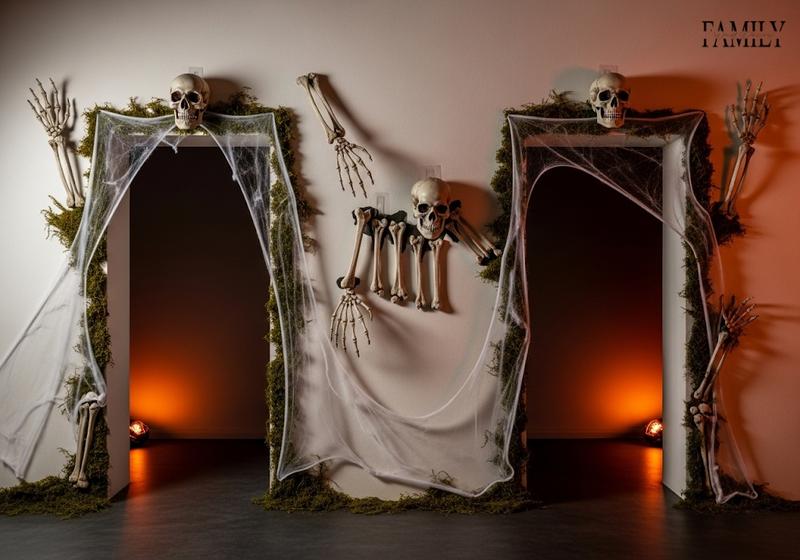
Use lightweight skeleton hands or skull halves, affixed with adhesive strips, to make it look like bones are clawing their way out of your walls. For an extra touch, add a dab of faux moss or cobwebs around each “entry point,” making it feel like the skeletons have been buried behind the drywall for years—until now.
Living in an apartment—or just avoiding nails and permanent fixtures—doesn’t mean you have to sacrifice style. These quick, temporary solutions let you create high-impact Halloween wall décor that looks custom but leaves no trace when it’s time to take it all down.
Cut witches on broomsticks, haunted houses, or curious black cats from contact paper or vinyl. These peel-and-stick designs go up in minutes and come off cleanly when Halloween is over, leaving your paint untouched and your landlord worry-free.
Give your walls depth by hanging witch hats, faux broomsticks, or even floating lanterns using Command hooks or strong adhesive strips. This creates a layered 3D look that makes your décor feel immersive—all without the need for nails or permanent hardware.
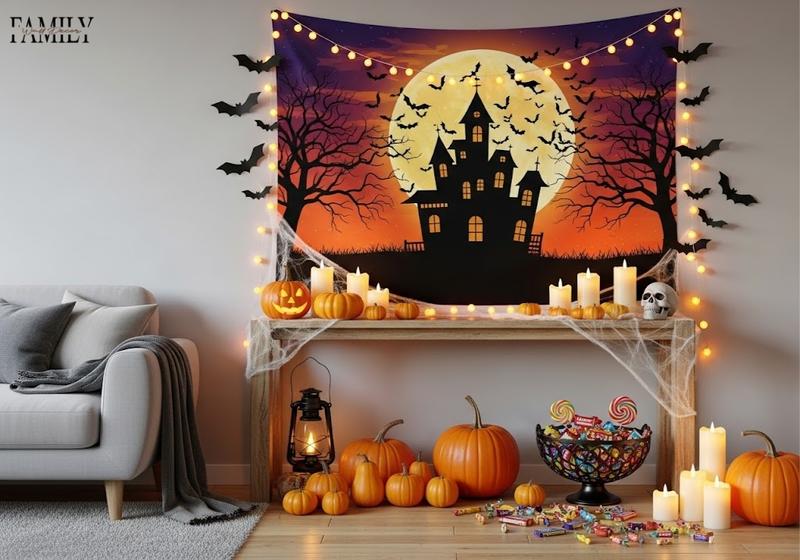
Turn an old bedsheet or Halloween-themed fabric into an oversized tapestry that covers an entire wall. Printed spider webs, haunted mansions, or even DIY-painted silhouettes can instantly set the mood. Use temporary hooks to hang it securely, then fold it away for next year’s haunting season.
Draw a giant geometric spider web directly on your wall using black washi tape. Add a few plastic spiders for dimension, and you’ve got a full-scale statement piece that costs almost nothing. When the season ends, peel away the tape in seconds—no cleanup required.
Ready to go beyond quick crafts? These advanced projects take a little more effort but deliver jaw-dropping results, making them perfect for Halloween parties, themed photo backdrops, or anyone who wants their home to feel like a haunted movie set.
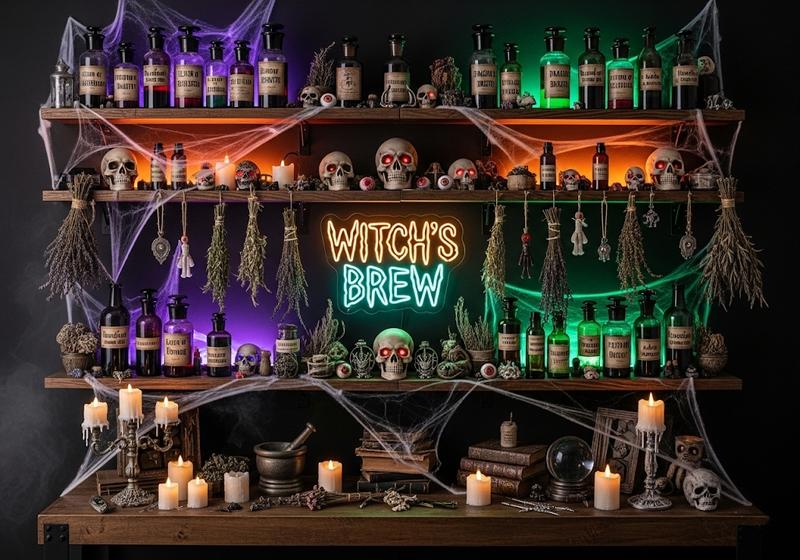
Turn one wall into a witch’s potion station by installing lightweight floating shelves and filling them with faux potion bottles, dried herbal bundles, and eerie skull accents. Add soft backlighting or a glowing accent from Halloween Neon Signs to make your display pop in the dark. The layered shelves and moody lighting give your room the look of an enchanted apothecary straight out of a storybook.
Perfect for photo ops, this dramatic design uses washable red paint or bloody handprint clings on a temporary panel. Position it behind a dining table, in an entryway, or as a party photo booth wall. The splattered look feels straight out of a thriller—but cleans up fast once the festivities are over.
Cut realistic insect shapes—think roaches, spiders, or beetles—from black vinyl or heavy paper. Arrange them emerging from vents or “crawling” out of corners for a subtle but unsettling detail. It’s one of those elements guests may not notice immediately, but once they do, expect a few startled shivers.
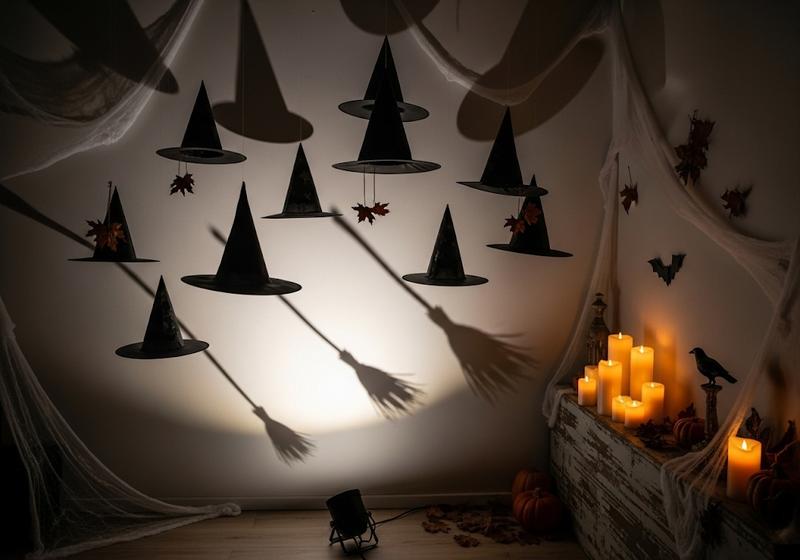
Suspend witch hats from fishing line so they hover just in front of the wall, then shine a spotlight at an angle to cast dramatic broom-like shadows. This creates the illusion of witches taking flight, adding motion and mystery to an otherwise plain wall.
Place battery-operated candles near mounted cutouts—like bats, owls, or even a howling wolf—to cast flickering, moving shadows across your walls. The gentle, dancing light adds atmosphere while staying safe for homes with kids or pets.
Halloween wall décor doesn’t have to be just for looks—it can also be part of the fun. These ideas double as interactive activities, making them perfect for family spaces, kid-friendly parties, and neighborhood gatherings where you want guests to engage, not just admire.
Set up a temporary black backdrop and supply glow-in-the-dark chalk or fluorescent pens. Guests can draw ghosts, write spooky greetings, or leave secret messages that light up under a blacklight. For a daytime twist, pair it with window accents like Halloween Suncatchers to catch sunlight and scatter eerie patterns across the room.
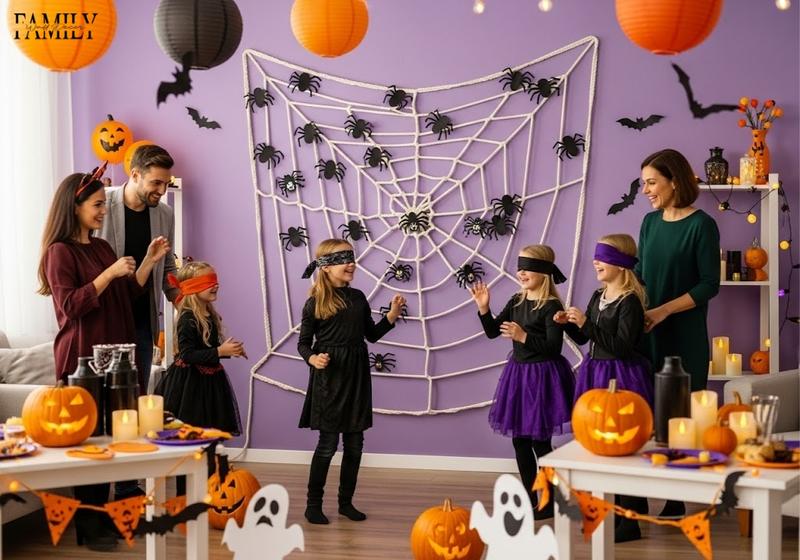
Give the classic party game a Halloween makeover by drawing or taping a large spider web onto your wall. Blindfold players and have them attempt to place paper spiders onto the web’s center. Laughter—and often slightly misplaced spiders—turns this décor piece into an instant party favorite.
Drape sheer black fabric cut with jagged edges or eerie eye shapes over a doorway so it shifts and sways as people walk through. The moving shadows create a ghostly effect, adding drama without any complex setup or expensive materials.
Even the most creative Halloween wall designs need a little planning to keep your home safe, renter-friendly, and stress-free. Before you start cutting bats or stringing ghostly fabrics, take a few minutes to prepare. These tips will help you create bold, dramatic designs while protecting your walls and keeping cleanup simple.
Skip nails, screws, or permanent glue in favor of removable options like Command hooks, painter’s tape, or heavy-duty mounting strips. These products are designed to hold your decorations securely while peeling away cleanly when the season is over. They’re perfect for renters or anyone who wants to avoid wall damage—and they save you from having to patch holes later.
Whenever possible, choose decorations that can be stored and reused next year. Cardstock cutouts, fabric banners, vinyl decals, and foam board silhouettes fold flat and keep well in storage bins. Not only does this save money over time, but it also cuts down on seasonal waste. For example, a fabric ghost banner or contact paper decals can be refreshed with just a few minor touches instead of buying new each year.
If your walls have textured paint, wallpaper, or unique finishes, always test adhesives on a hidden spot first. Some surfaces may not pair well with certain tapes or strips, leading to peeling or residue. Spending five minutes on a quick test can save you hours of touch-ups later.
Halloween décor often involves paper, fabric, and lightweight plastics—all of which can be fire hazards near open flames. Opt for battery-operated candles, LED lanterns, and string lights to get the same spooky glow without the risk. These lights often include flicker effects that mimic real candles, giving you ambiance without worry.
Before grabbing adhesives and mounting décor, sketch your design or lay out all pieces on the floor to preview how everything will look together. Planning reduces the need for repositioning (which can weaken adhesives) and ensures your final look feels intentional rather than pieced together. This is especially useful for gallery-style walls, intricate spider webs, or photo backdrops.
When Halloween is over, pack decorations in labeled storage bins by category (e.g., “wall cutouts,” “string décor,” “LED lights”). This not only keeps items organized but also extends their life, making next year’s decorating faster and easier.
DIY Halloween wall décor doesn’t just add seasonal decorations—it transforms your home into an immersive experience. From eerie haunted portrait galleries to glowing spider webs and interactive games for the kids, your walls become part of the Halloween story you want to tell.
The beauty of these ideas is that you don’t need a big budget or permanent changes to your space. A few renter-friendly adhesives, reusable materials, and creative touches can turn any blank wall into a spooky showcase that feels personal and memorable.
So start small: choose one or two projects from this list, gather your supplies, and try them this weekend. By Halloween night, you’ll have a space that’s spine-chillingly stylish and uniquely yours—a haunted masterpiece ready to impress guests, delight kids, and maybe even surprise yourself with what’s possible when creativity meets DIY spirit.